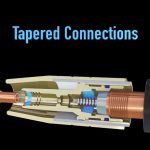
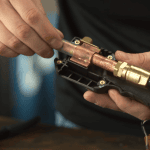
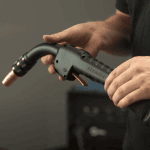
Product Guide: Clean Air E™ – Changing the Y Connector
Keep your Bernard® Clean Air E™ Fume Extraction MIG Gun performing at its best by replacing the Y-connector when needed. This quick guide walks you through the simple steps to ensure a secure fit and maintain optimal fume extraction efficiency. Watch now to keep your system running smoothly and your workspace cleaner.
Instructions
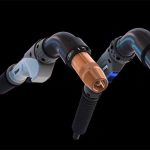
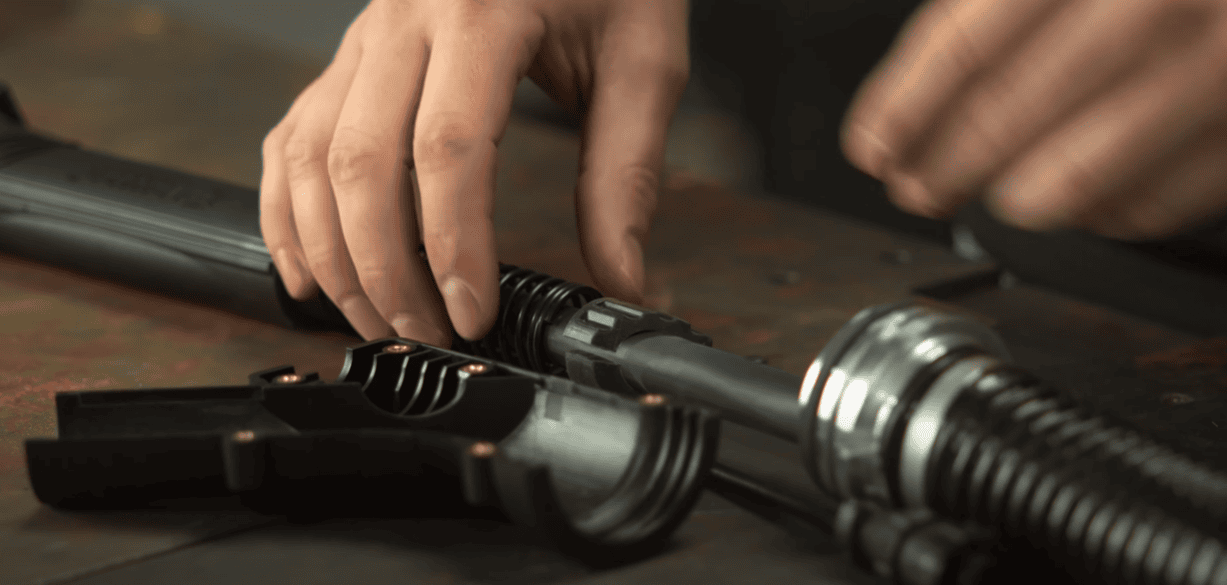
Separate connector halves.
Push rear hose swivel forward to slide it out of the cavity. Slide the hose assembly forward and remove the remaining Y Connector half.
Place the new rubber boot into the new Y Connector set.
Position the cable assembly in the Y Connector channel, ensuring proper alignment with rubber boot.
Pull the hose assembly back into the swivel cavity and ensure it is taut (no slack).
Confirm the hose and cable assemblies are properly seated and secure.
Align the Y Connector halves and reinstall screws.
Find more resources at www.startsatthesource.com
Product Guide: Clean Air E™ – Connecting to a Fume Extraction Unit
Product Guide: Clean Air E™ – Connecting to a Fume Extraction Unit
Properly connecting your Bernard® Clean Air E™ Fume Extraction MIG Gun to a fume extraction unit is key to maximizing performance and maintaining a cleaner work environment. In this video, we walk you through the simple steps to ensure a secure and efficient connection, helping you get the most out of your fume extraction system.
Instructions
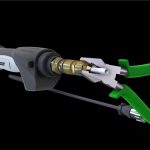
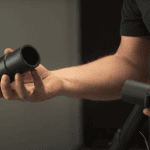
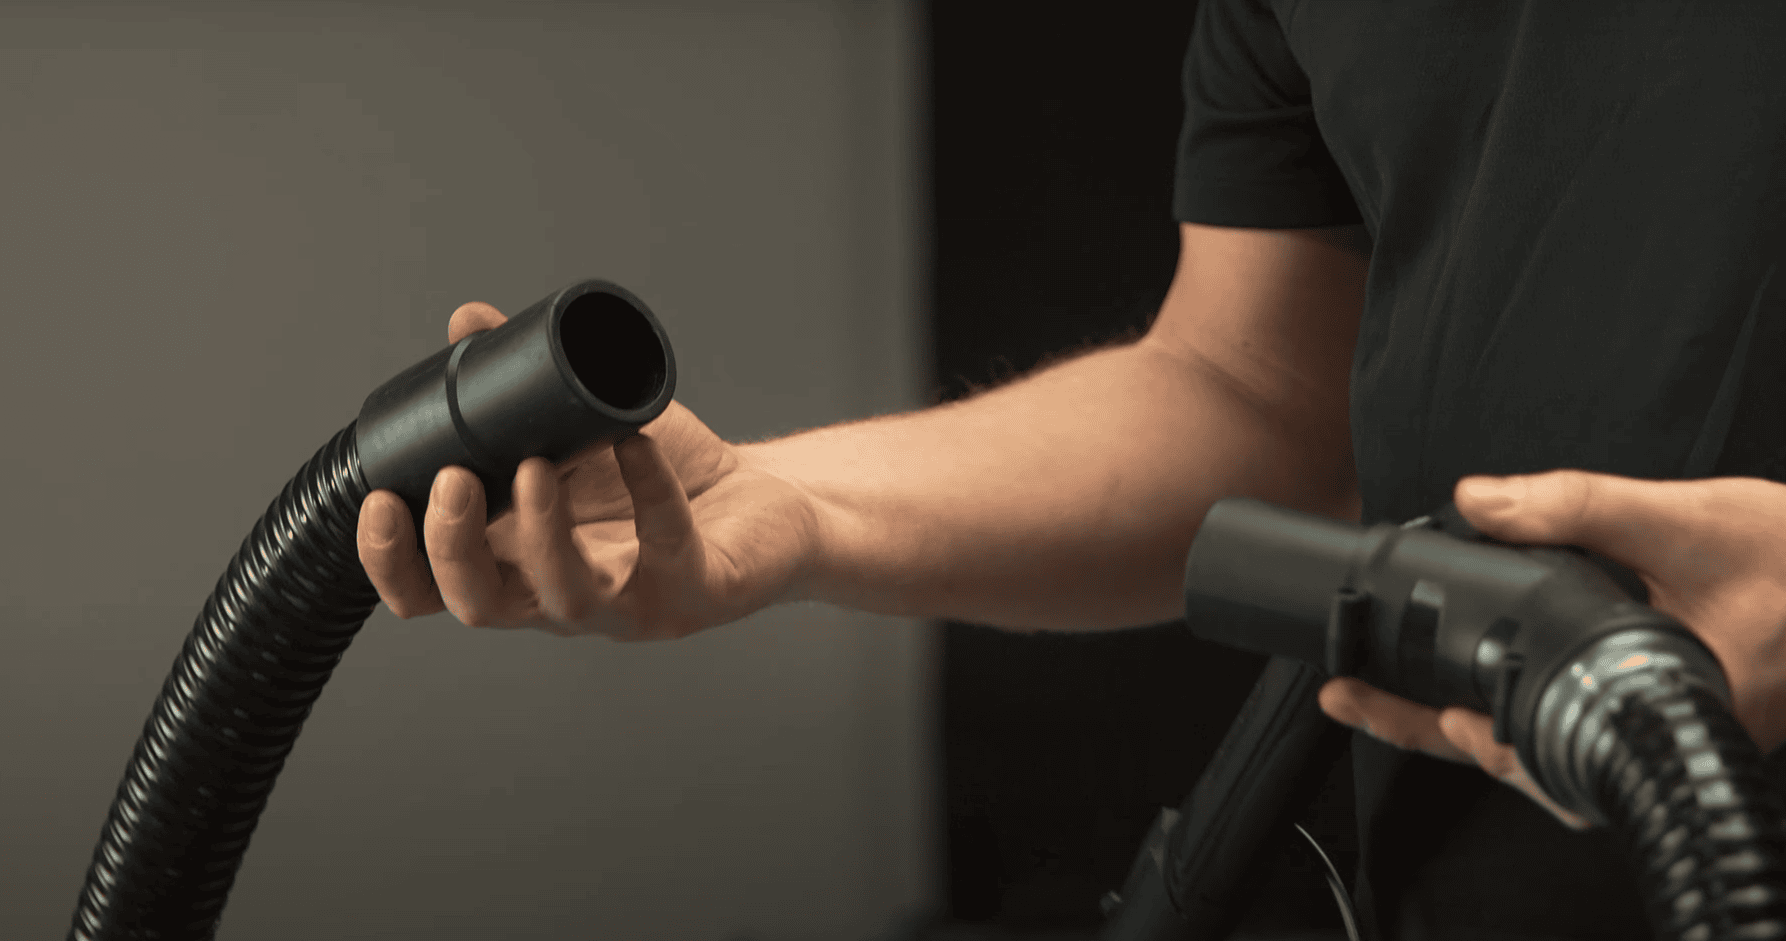
Thread hose onto the fume port of the fume extraction unit and tighten securely.
Attach the opposite end of hose to the 1-3/4” port on the Y Connector, ensuring all connections are tight.
Find more resources at www.startsatthesource.com
Product Guide: Clean Air E™ – Replacing the Neck and Trigger
Product Guide: Clean Air E™ – Replacing the Neck and Trigger

Maintaining your Bernard® Clean Air E™ Fume Extraction MIG Gun is quick and easy! Watch as we walk through the simple process of replacing the neck and trigger, ensuring your gun stays in top working condition. Designed for durability and performance, the Clean Air E™ makes maintenance hassle-free so you can focus on the job.
Instructions
Changing the Inner Neck Assembly
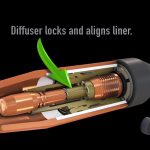
Remove the Shroud and Consumables: Unthread the knurled smoke shroud from the smoke tube assembly and remove the front end consumables.
Separate the Handle Halves: Remove the socket head cap screws (7/64″ hex) and keep them for later.
Remove the Smoke Tube Assembly: Slide it forward and off the inner neck assembly.
Loosen the Lock Nut: Place the neck in a vise (don’t over-tighten). Use 3/4” wrenches to loosen the lock nut on the neck.
Unthread the Neck: Once the lock nut is loose, unthread the neck from the end fitting by hand.
Replace the Neck: Add the lock nut to the new neck, thread it into the cable end fitting, and tighten by hand. Secure the neck in a vise and torque the lock nut/end fitting connection to 30 ft-lbs (40.7 Nm).
Reassemble the Handle: Position the neck and smoke tube assembly into the handle. Ensure the trigger components and vacuum slide are correctly placed, with trigger wires routed properly.
Secure the Handle Halves: Use the handle screws and torque them to 10 in-lbs (1.1 Nm).
Changing the Switch – Button Model
Separate the Handle Halves: Remove the screws completely.
Remove the Terminals: Use needle nose pliers to remove the terminals from the trigger switch.
Attach the New Trigger: Secure the terminals to the new trigger, position it in the right handle half, and ensure the wires are routed correctly.
Reassemble the Handle: Reinstall the second handle half, tighten all screws, and torque to 10 in-lbs (1.1 Nm).
Changing the Switch – Lever Model
Separate the Handle Halves: Remove the screws completely.
Remove the Switch Assembly: Use needle nose pliers to disconnect the terminals and carefully remove the lever.
Attach the New Switch: Secure the terminals to the new switch assembly, install it into the mounting cavity, and reinstall the lever.
Reassemble the Handle: Ensure all components are correctly positioned, then reinstall the second handle half, starting with the lever screw. Tighten all screws and torque to 10 in-lbs (1.1 Nm).
Changing the Vacuum Slide Switch
Separate the Handle Halves: Remove the screws completely.
Remove the Slide Switch: Carefully take it out of the channel in the handle half.
Install the New Slide Switch: Position it in the channel, ensuring it moves freely.
Reassemble the Handle: Keep the slide switch properly aligned and reinstall the screws, tightening them evenly and torquing to 10 in-lbs (1.1 Nm)
Find more resources at www.startsatthesource.com
Product Guide: Clean Air E™ – Changing Shrouds to Maximize Fume Extraction

Product Guide: Clean Air E™ – Changing Shrouds to Maximize Fume Extraction
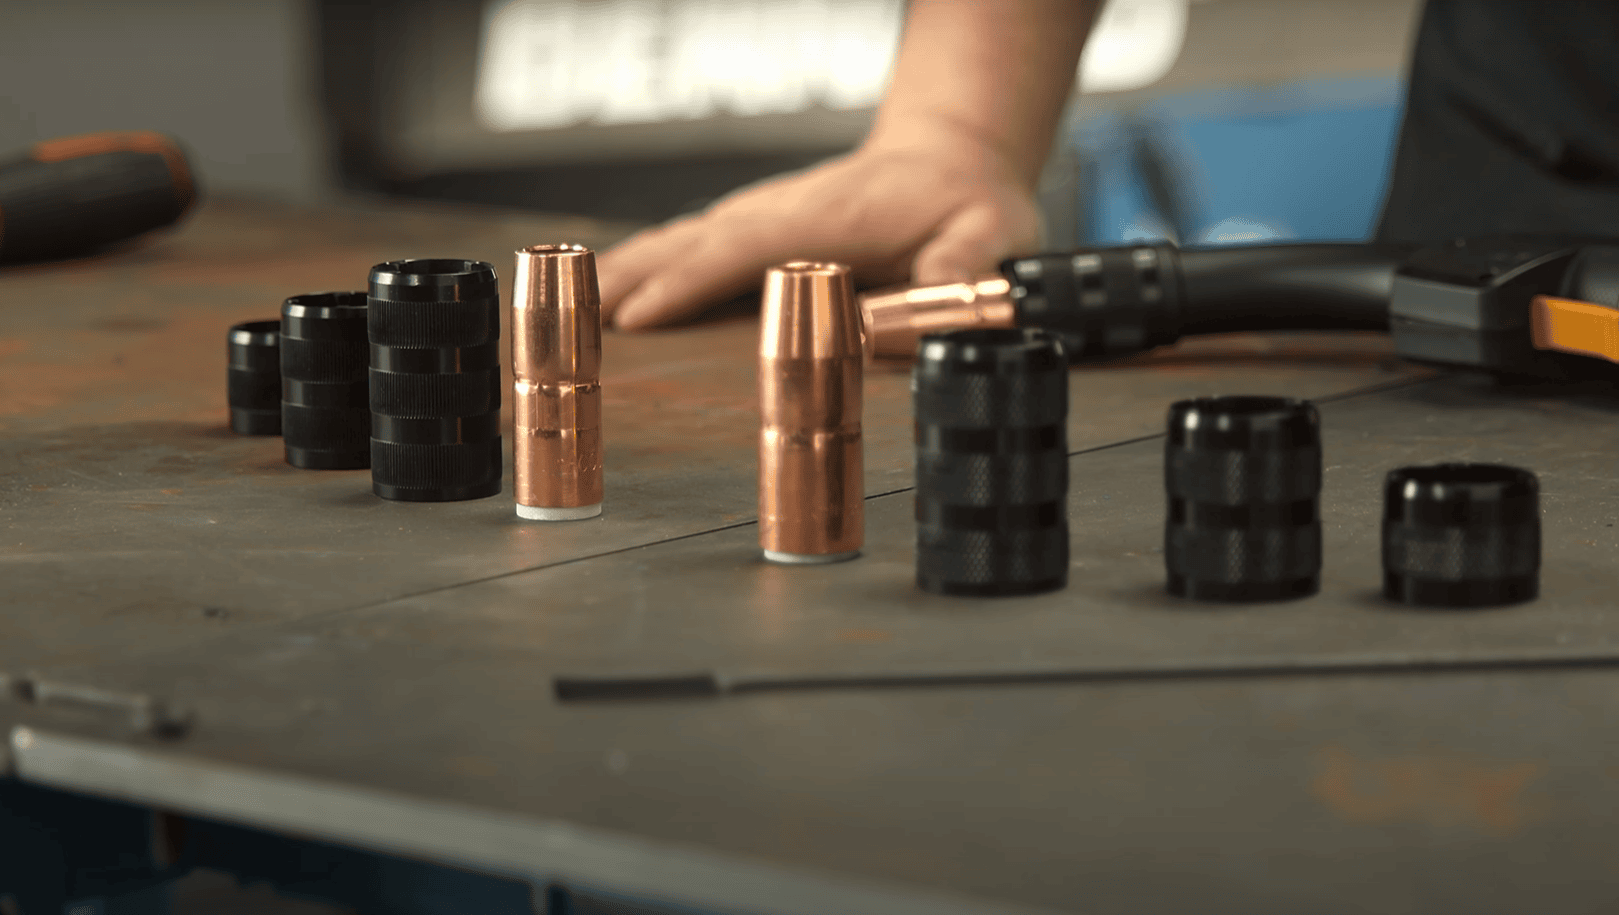
We designed the Bernard® Clean Air E™ Fume Extraction Gun with interchangeable shrouds, giving you the flexibility to optimize fume capture for your specific welding application. Choose from a longer shroud for maximum fume extraction, a medium shroud for the perfect balance of weld access and fume capture, or a short shroud for maximum weld access while still extracting fumes.
Instructions
Simply unthread the fume shroud from the neck tube and rethread your desired shroud based on your nozzle size and welding application.
Find more resources at www.startsatthesource.com
Product Guide: Clean Air E™ – Changing Out the Hose
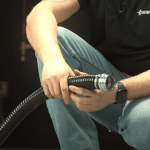
Product Guide: Clean Air E™ – Changing Out the Hose
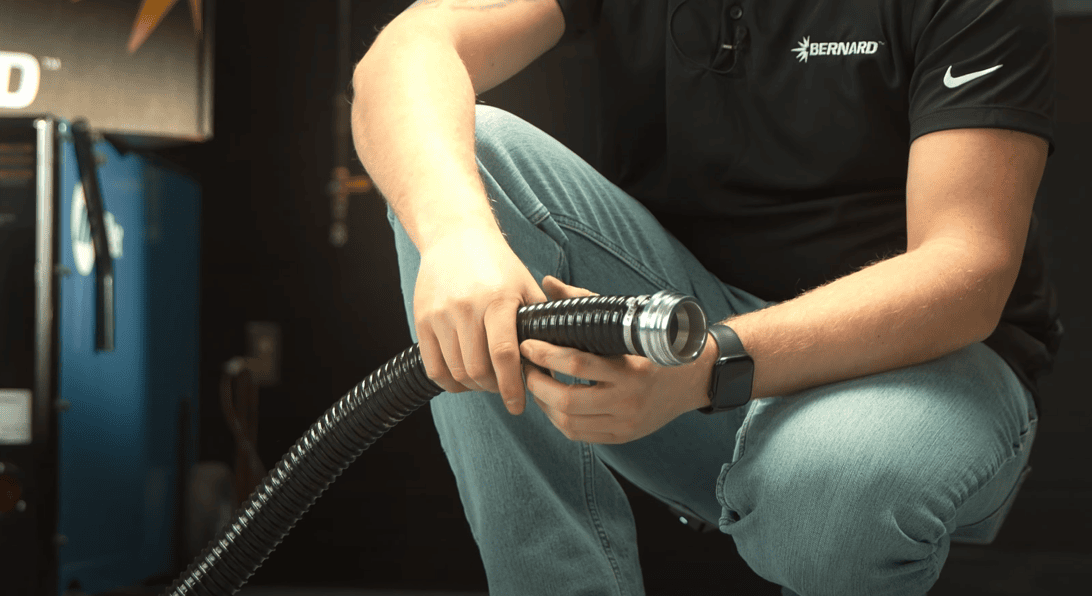
Need to replace the hose on your Clean Air E™ fume extraction gun? We’ve got you covered! Follow these simple steps to swap it out quickly and keep your fume extraction system performing at its best. Watch now and ensure clean, efficient welding every time.
Instructions
1. If replacing the vacuum hose assembly, remove all screws to separate the handle halves and remove the front hose swivel from its cavity.
2. Remove screw covers and two screws securing the rear handle, then slide the rear handle and strain relief backward to remove them.
3. Remove screws on the Y Connector and open to expose the cable assembly and rear hose swivel.
4. Pull the vacuum hose assembly backward to remove it from the cable assembly.
5. Slide the new vacuum hose assembly forward over the cable assembly until the front hose swivel rests in its cavity. Align the handle halves and reinstall all screws to retain hose assembly within handle.
6. With the cable straight, pull the hose and position it into the Y Connector, ensuring no slack. Tighten Y Connector screws, correctly positioning rubber boot within the Y Connector.
7. Slide rear handle and strain relief forward onto the cable assembly and secure with screws and screw covers.
Find more resources at www.startsatthesource.com
Introducing Clean Air E™

Introducing Clean Air E™

Bernard’s Clean Air E™ fume extraction MIG Gun helps create a cleaner and more productive welding environment by capturing up to 95% of fumes at the source, improving weld visibility, and reducing welder fatigue. Designed for durability in heavy industrial use, it minimizes rework, lowers compliance risks, and supports efforts to attract and retain top talent. Say goodbye to compromise and hello to precision, performance, and peace of mind.
It Starts At The Source™
Learn more: https://www.startsatthesource.com
Features and Benefits of the Clean Air E™
Features and Benefits of the Clean Air E™

Discover the Clean Air E™ difference.
Superior Fume Control Right at the Source With up to 95% source fume capture efficiency, the Clean Air E minimizes airborne contaminants, protects your team, and improves visibility on every weld. It helps you meet stringent compliance standards without compromise. Effortless Ergonomics for Extended Use Designed for welders, the Clean Air E features a balanced build, optimized handle design, and a ball swivel for added flexibility. This reduces strain and improves control, focusing on comfort and efficiency to help welders stay productive through long shifts. Industrial-Grade Durability, Reduced Downtime Built for heavy-duty use, the Clean Air E is engineered to last. Its rugged design, combined with long-life consumables, reduces maintenance demands and lowers total costs, keeping your team welding without interruption. Enhanced Visibility for Precise Welds Clearer sightlines mean better welds. The Clean Air E is designed to minimize arc obstructions, providing improved visibility and weld access. With a better view of the weld puddle, welders can work with greater accuracy, control, and consistency.
Want to learn more? Click here.
Welding students in Tulsa benefit from Bernard MIG Guns and Consumables | Customer Testimonial

Welding students in Tulsa benefit from Bernard® MIG Guns and Consumables
Tulsa Welding School’s Houston campus needs reliable equipment that can handle any process. Bernard® MIG guns and consumables are the answer. “Bernard (guns) they’re real comfortable in my hand you know. They’re not too big and bulky. They’re not too heavy. The neck ratio on that, is just, they’re awesome. I like them. The lighter the gun can be is great for a welder.”, Greg Langdon – welding instructor.
Blinn Instructors Choose Bernard MIG Guns and Consumables for Dependable Welding Equipment | Customer Testimonial

Blinn Instructors Choose Bernard® MIG Guns and Consumables for Dependable Welding Equipment
“Here at Blinn when we chose welding equipment first and foremost I want something solid. That’s going to be there for me for years. In our labs we have connected all our Miller 22 A wire feeders to Bernard guns. Centerfire is so user friendly that I actually bought conversion kits and changed all our non-Bernard gear over to Bernard consumables” – Blinn welding instructor, John McGee.
Instructors and students at Blinn College have come to rely on Bernard product for molding future welders. Bernard MIG guns and consumables are easy to use and a welder’s best choice in dependability.
For a cleaner, more compliant work environment, get right to the source and extract fumes at the weld with the Bernard Clean Air fume extraction gun. Build your ultimate MIG gun. Choose from a variety of necks, handles and trigger styles to optimize welder ergonomics and weld access. Then standardize with a single line of consumables to simplify maintenance and contain costs. You can count on Bernard BTB semi-automatic air-cooled MIG guns to deliver industrial-grade performance and reliability in the most demanding and abusive environments.
Now mobile friendly! Configure your Bernard semi-automatic MIG gun – anytime, anywhere.
Bernard AccuLock S consumables provide error-proof liner replacement every time — no measuring required! Dual-locked in the contact tip and power pin AccuLock S liners guarantees optimized wire-feeding. TOUGH GUN TA3 robotic air-cooled MIG guns are compatible with various through-arm style robots and provide outstanding precision and reliability. Configure to be the durable and reliable solution for best in class welding.
Engineered for hard tooling automation applications, Tregaskiss fixed automatic MIG guns are simple to maintain, durable and repeatable. They are available in air-cooled and water-cooled models.
High performance consumables with an armored neck and body plus simple internal connections equal Tregaskiss fixed automatic MIG guns. They are quick and easy to maintain for maximum up-time and throughput. Models available in air-cooled or water-cooled.
Automating spatter removal helps to extend the life of your robotic MIG welding guns and consumables. It can benefit your bottom line, production up-time and throughput. Choose between our TOUGH GUN TT4A reamer (analog model) or our new TOUGH GUN TT4E reamer (Ethernet model) for further enhanced with digital Ethernet communication for better integration.
Tregaskiss TOUGH GUN TT4 reamer is tough on spatter and operates reliably in even the harshest welding environments. Automating spatter removal will help to extend the life of your robotic MIG guns and consumables.
Designed for increased tip life, Tregaskiss AccuLock R consumables can reduce your replacement frequency and related planned downtime.
AccuLock HDP contact tips can increase life by an additional 6-10x or more in pulse welding applications.
Designed for increased tip life, Tregaskiss AccuLock R consumables can reduce your replacement frequency and related planned downtime. AccuLock HDP contact tips can increase life up to 10x in pulse welding applications.
Customize your Tregaskiss robotic MIG gun or reamer for your specific application using our new mobile-friendly online configurators!
Choosing equipment with fewer points of failure and simplified maintenance can help support more inexperienced welders. Bernard AccuLock S consumables can reduce training and shorten your troubleshooting list so you can focus on welding productivity.
Bernard Clean Air Fume Extraction MIG Welding Guns
Bernard® Clean Air™ Fume Extraction MIG Welding Guns
Bernard BTB Semi-Automatic Air-Cooled MIG Welding Guns
Bernard® BTB Semi-Automatic Air-Cooled MIG Welding Guns
Video | Configure your Bernard Semi-Automatic MIG Gun Online
Configure your Bernard® Semi-Automatic MIG Gun Online
Bernard AccuLock S Consumables No Measuring Required
Bernard® AccuLock™ S Consumables – No Measuring Required
Bernard AccuLock S Consumables Dual-Locked Liner
Bernard® AccuLock™ S Consumables: Dual-Locked Liner
TOUGH GUN TA3 Robotic Air-Cooled MIG Welding Guns
Tregaskiss® TOUGH GUN® TA3 Robotic Air-Cooled MIG Welding Guns
Tregaskiss Fixed Automatic MIG Guns
Tregaskiss® Fixed Automatic MIG Guns
Video | Tregaskiss Fixed Automatic MIG Guns
Tregaskiss® Fixed Automatic MIG Guns
Tregaskiss TOUGH GUN Reamer Robotic Nozzle Cleaning Stations
Tregaskiss® TOUGH GUN® Reamer Robotic Nozzle Cleaning Stations
Video | Tregaskiss TOUGH GUN Reamer Robotic Nozzle Cleaning Stations
Tregaskiss® TOUGH GUN® Reamer Robotic Nozzle Cleaning Stations
Video | Tregaskiss AccuLock R Consumables for Better Throughput
Tregaskiss® AccuLock™ R Consumables for Better Throughput
Video | Tregaskiss AccuLock HDP Contact Tips
Tregaskiss® AccuLock™ HDP Contact Tips
Tregaskiss AccuLock R Consumables
Tregaskiss® AccuLock™ R Consumables
Video | Configure your Tregaskiss Robotic MIG Gun and Reamer Online
Configure your Tregaskiss® Robotic MIG Gun and Reamer Online
Video | Bernard AccuLock S Consumables for the Inexperienced Welders
Bernard® AccuLock™ S Consumables for the Inexperienced Welders

![]()