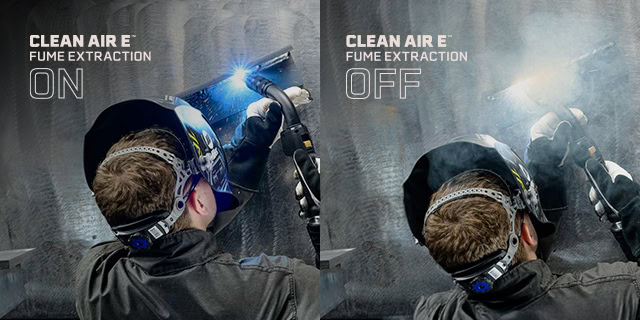
The New Clean Air E™ Fume Extraction MIG Gun Offers Superior Fume Capture, Enhanced Ergonomics
Up to 95% fume capture efficiency and optimized design make workspaces safer and reduce welder strain
For Immediate Release
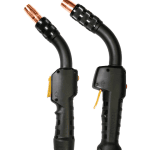
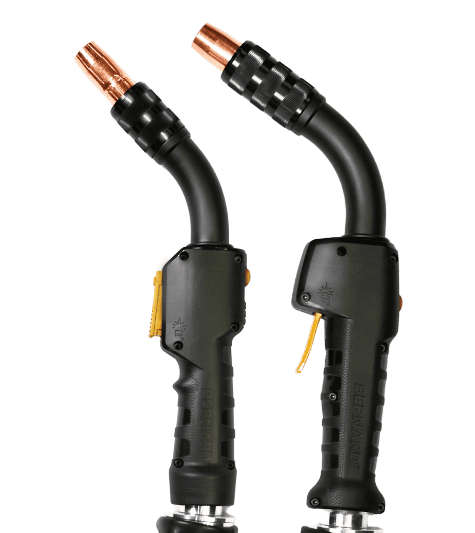
BEECHER, Ill./WINDSOR, Ontario (March 20, 2025) — Bernard announced the release of the new Clean Air E™ fume extraction MIG gun, the newest high-efficiency fume extraction gun in the brand’s lineup. Crafted for efficient extraction, enhanced ergonomics and engineered endurance, this gun sets a new standard in MIG welding fume capture technology.
With an ongoing priority to ensure safer, cleaner work environments for operators coupled with heightened fume standards being implemented across the country, Bernard saw an opportunity to evolve the standard fume extraction gun to maximize its efficiency and usability. Bernard took customer and welder feedback and designed a product that would be the most impactful for welders in a next-generation fume extraction gun. The team applied that feedback throughout the research and development process until it resulted in the Clean Air E™, which offers solutions to common operator pain points, including:

· Efficient extraction: The Clean Air E™ achieves up to 95% fume capture right at the source, which improves air quality in the workspace and reduces OSHA-related risks.
· Enhanced ergonomics: The ergonomic design reduces strain and fatigue on welders, which allows them to focus on precision and quality for extended use.
· Engineered for endurance: The Clean Air E™ features durable components and long-life consumables, which reduces downtime and maintenance costs, delivering a lower cost of total ownership.
“When it comes to welding, operators seek the trifecta in their gun: ergonomics, extraction performance and ease of maintenance,” said Jerome Parker, product manager, Bernard. “The Clean Air E™ was designed alongside actual users to ensure we arrived at a solution that redefined traditional fume capture guns for the modern welder, enhancing both their operator experience and their weld environment.”
On the gun itself, the Clean Air E™ offers enhanced features for easier and more efficient use:
· Improved weld access: Three nozzle shroud lengths allow operators to balance fume capture with weld access and improved visibility of the weldment.
· Instant flow adjustment: The new flow control slide on the back of the handle enables welders to easily reduce airflow by up to 10 cfm to help overcome porosity issues.
· Upgraded handle comfort: Two handle styles are available to suit different grip styles and hand sizes, with internals contoured to enhance airflow and fume capture. The lever trigger can also be mounted on top for additional comfort.
· Increased flexibility: A durable, lightweight aluminum ball swivel at the end of the handle provides 15 degrees of extra flex in any direction for additional improved ergonomics.
· Maximized airflow: A new Y-connector offers contoured internals that maximize airflow, with a vacuum outlet that is compatible with any fume extraction unit. For a premium fume extraction pairing, operators have the option to connect the Clean Air E™ to the Miller® FILTAIR® 215.
Learn more about how the Clean Air E™ can deliver safety, performance and comfort for welders at https://www.startsatthesource.com/
About Bernard Bernard, a leading manufacturer of premium semi-automatic MIG welding guns and consumables, is dedicated to enhancing welding productivity and performance. Headquartered in Beecher, Illinois, Bernard is known for innovative solutions that prioritize operator comfort, ease of maintenance, and exceptional durability. Bernard is a proud brand of Illinois Tool Works Inc. (NYSE: ITW). For more information, visit BernardTregaskiss.com, call 1-855-MIGWELD (1-855-644-9353), email CS@itwmig.com.
Contact: Lauren Smith, Hiebing for Bernard/Tregaskiss phone: +1 6082684408 lsmith@hiebing.com
Product Guide: Clean Air E™ – Changing the Y Connector

Product Guide: Clean Air E™ – Changing the Y Connector
Keep your Bernard® Clean Air E™ Fume Extraction MIG Gun performing at its best by replacing the Y-connector when needed. This quick guide walks you through the simple steps to ensure a secure fit and maintain optimal fume extraction efficiency. Watch now to keep your system running smoothly and your workspace cleaner.
Instructions
Separate connector halves.
Push rear hose swivel forward to slide it out of the cavity. Slide the hose assembly forward and remove the remaining Y Connector half.
Place the new rubber boot into the new Y Connector set.
Position the cable assembly in the Y Connector channel, ensuring proper alignment with rubber boot.
Pull the hose assembly back into the swivel cavity and ensure it is taut (no slack).
Confirm the hose and cable assemblies are properly seated and secure.
Align the Y Connector halves and reinstall screws.
Find more resources at www.startsatthesource.com
Product Guide: Clean Air E™ – Connecting to a Fume Extraction Unit
Product Guide: Clean Air E™ – Connecting to a Fume Extraction Unit
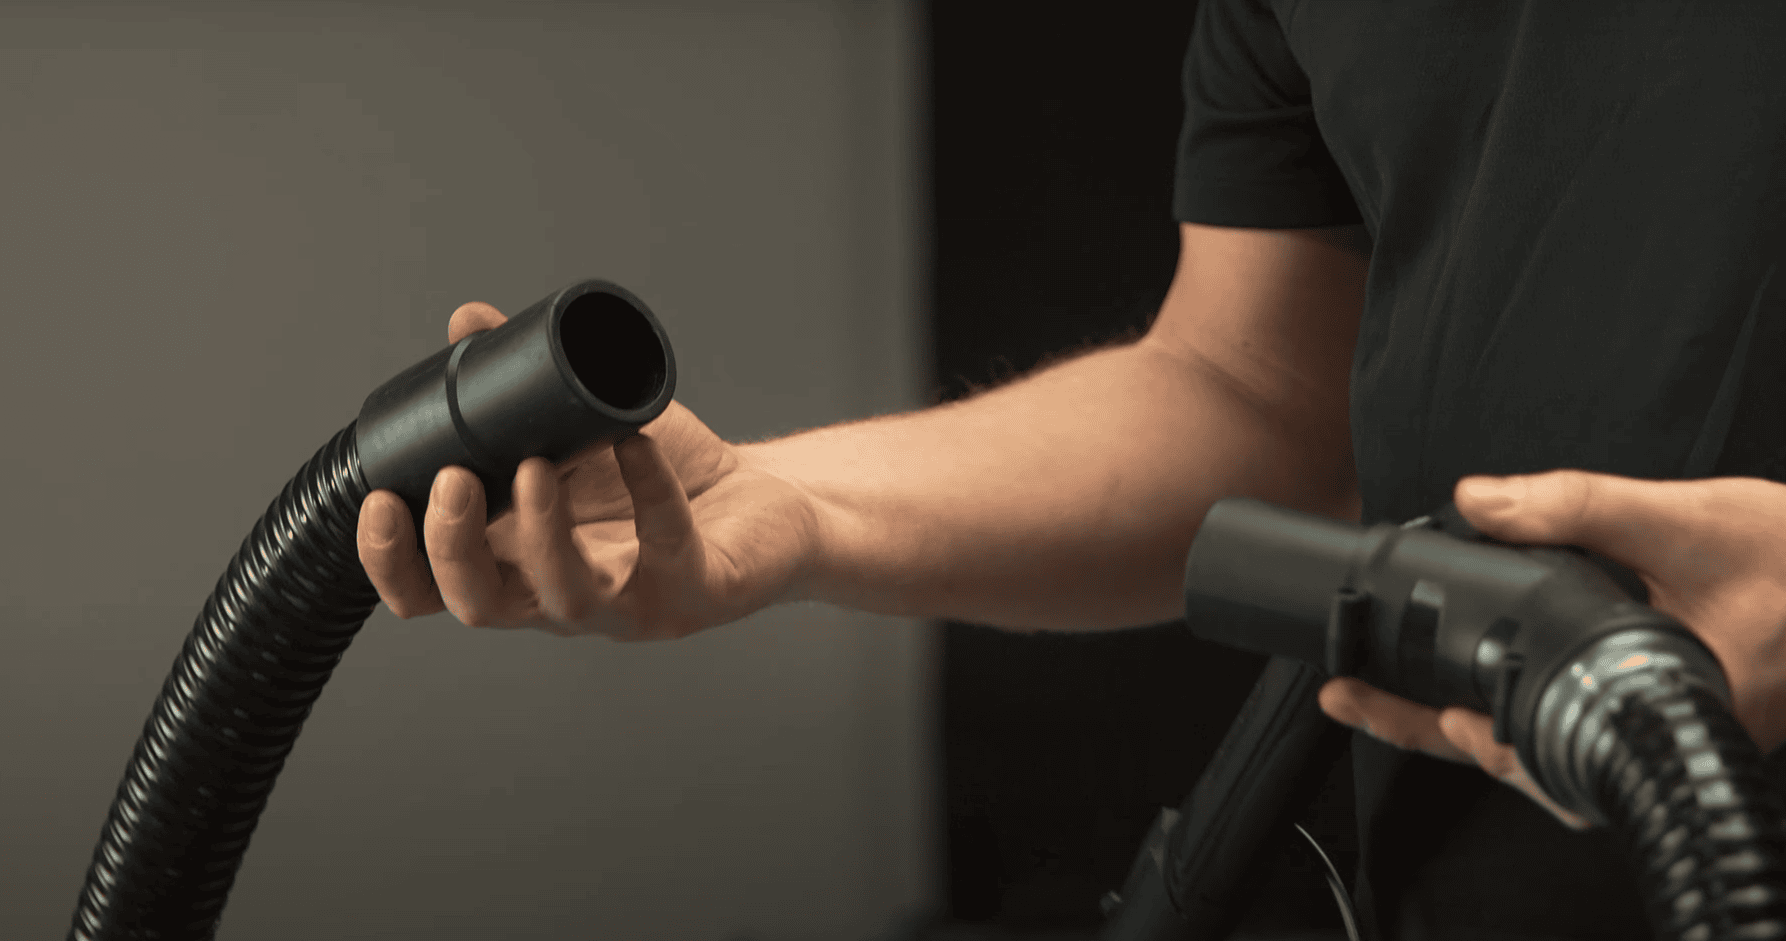
Properly connecting your Bernard® Clean Air E™ Fume Extraction MIG Gun to a fume extraction unit is key to maximizing performance and maintaining a cleaner work environment. In this video, we walk you through the simple steps to ensure a secure and efficient connection, helping you get the most out of your fume extraction system.
Instructions
Thread hose onto the fume port of the fume extraction unit and tighten securely.
Attach the opposite end of hose to the 1-3/4” port on the Y Connector, ensuring all connections are tight.
Find more resources at www.startsatthesource.com
Product Guide: Clean Air E™ – Replacing the Neck and Trigger
Product Guide: Clean Air E™ – Replacing the Neck and Trigger

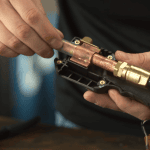
Maintaining your Bernard® Clean Air E™ Fume Extraction MIG Gun is quick and easy! Watch as we walk through the simple process of replacing the neck and trigger, ensuring your gun stays in top working condition. Designed for durability and performance, the Clean Air E™ makes maintenance hassle-free so you can focus on the job.
Instructions
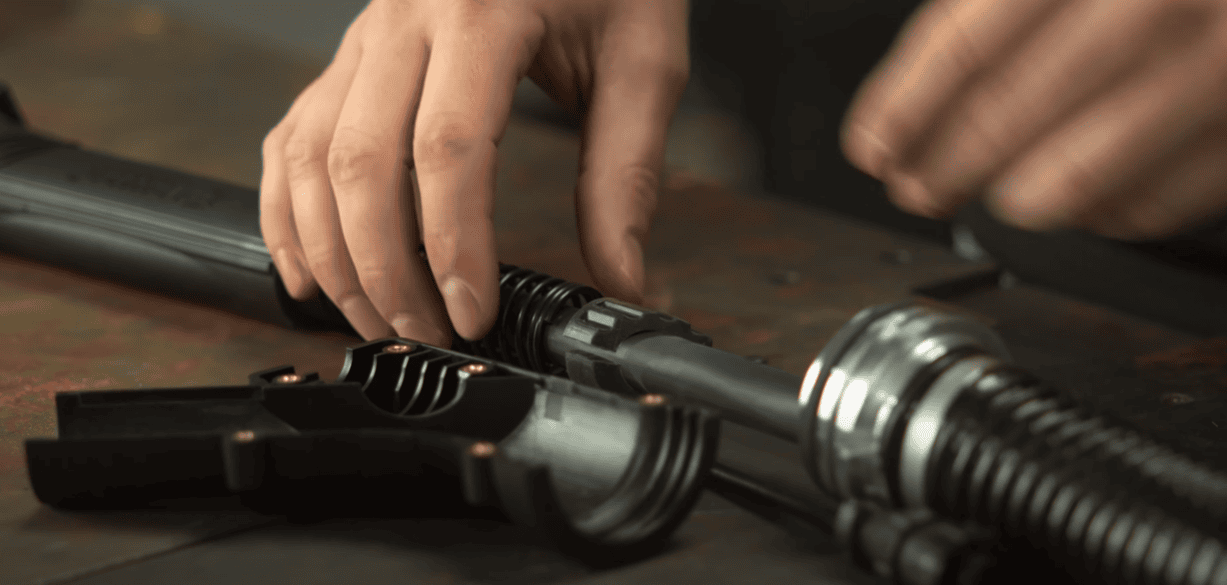
Changing the Inner Neck Assembly
Remove the Shroud and Consumables: Unthread the knurled smoke shroud from the smoke tube assembly and remove the front end consumables.
Separate the Handle Halves: Remove the socket head cap screws (7/64″ hex) and keep them for later.
Remove the Smoke Tube Assembly: Slide it forward and off the inner neck assembly.
Loosen the Lock Nut: Place the neck in a vise (don’t over-tighten). Use 3/4” wrenches to loosen the lock nut on the neck.
Unthread the Neck: Once the lock nut is loose, unthread the neck from the end fitting by hand.
Replace the Neck: Add the lock nut to the new neck, thread it into the cable end fitting, and tighten by hand. Secure the neck in a vise and torque the lock nut/end fitting connection to 30 ft-lbs (40.7 Nm).
Reassemble the Handle: Position the neck and smoke tube assembly into the handle. Ensure the trigger components and vacuum slide are correctly placed, with trigger wires routed properly.
Secure the Handle Halves: Use the handle screws and torque them to 10 in-lbs (1.1 Nm).
Changing the Switch – Button Model
Separate the Handle Halves: Remove the screws completely.
Remove the Terminals: Use needle nose pliers to remove the terminals from the trigger switch.
Attach the New Trigger: Secure the terminals to the new trigger, position it in the right handle half, and ensure the wires are routed correctly.
Reassemble the Handle: Reinstall the second handle half, tighten all screws, and torque to 10 in-lbs (1.1 Nm).
Changing the Switch – Lever Model
Separate the Handle Halves: Remove the screws completely.
Remove the Switch Assembly: Use needle nose pliers to disconnect the terminals and carefully remove the lever.
Attach the New Switch: Secure the terminals to the new switch assembly, install it into the mounting cavity, and reinstall the lever.
Reassemble the Handle: Ensure all components are correctly positioned, then reinstall the second handle half, starting with the lever screw. Tighten all screws and torque to 10 in-lbs (1.1 Nm).
Changing the Vacuum Slide Switch
Separate the Handle Halves: Remove the screws completely.
Remove the Slide Switch: Carefully take it out of the channel in the handle half.
Install the New Slide Switch: Position it in the channel, ensuring it moves freely.
Reassemble the Handle: Keep the slide switch properly aligned and reinstall the screws, tightening them evenly and torquing to 10 in-lbs (1.1 Nm)
Find more resources at www.startsatthesource.com
Product Guide: Clean Air E™ – Changing Shrouds to Maximize Fume Extraction

Product Guide: Clean Air E™ – Changing Shrouds to Maximize Fume Extraction
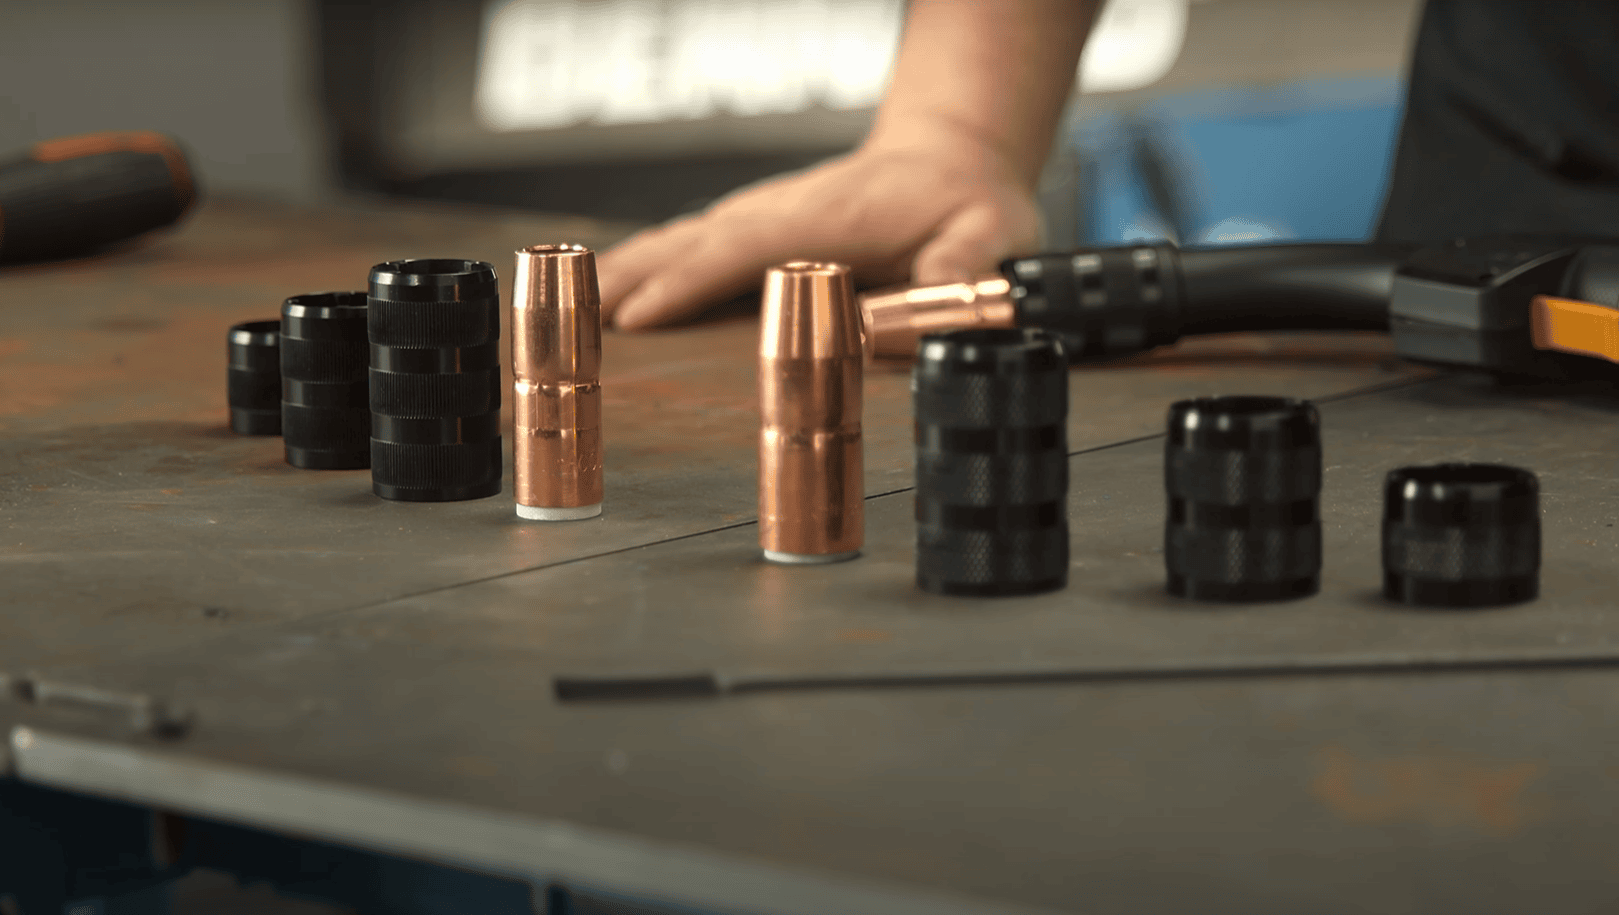
We designed the Bernard® Clean Air E™ Fume Extraction Gun with interchangeable shrouds, giving you the flexibility to optimize fume capture for your specific welding application. Choose from a longer shroud for maximum fume extraction, a medium shroud for the perfect balance of weld access and fume capture, or a short shroud for maximum weld access while still extracting fumes.
Instructions
Simply unthread the fume shroud from the neck tube and rethread your desired shroud based on your nozzle size and welding application.
Find more resources at www.startsatthesource.com
Product Guide: Clean Air E™ – Changing Out the Hose
Product Guide: Clean Air E™ – Changing Out the Hose
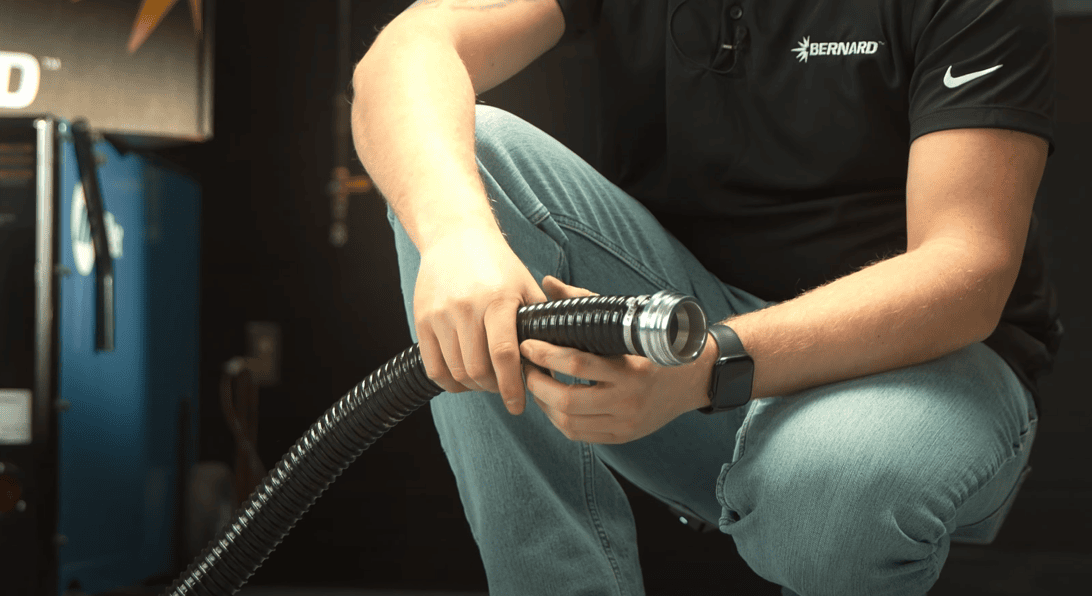
Need to replace the hose on your Clean Air E™ fume extraction gun? We’ve got you covered! Follow these simple steps to swap it out quickly and keep your fume extraction system performing at its best. Watch now and ensure clean, efficient welding every time.
Instructions
1. If replacing the vacuum hose assembly, remove all screws to separate the handle halves and remove the front hose swivel from its cavity.
2. Remove screw covers and two screws securing the rear handle, then slide the rear handle and strain relief backward to remove them.
3. Remove screws on the Y Connector and open to expose the cable assembly and rear hose swivel.
4. Pull the vacuum hose assembly backward to remove it from the cable assembly.
5. Slide the new vacuum hose assembly forward over the cable assembly until the front hose swivel rests in its cavity. Align the handle halves and reinstall all screws to retain hose assembly within handle.
6. With the cable straight, pull the hose and position it into the Y Connector, ensuring no slack. Tighten Y Connector screws, correctly positioning rubber boot within the Y Connector.
7. Slide rear handle and strain relief forward onto the cable assembly and secure with screws and screw covers.
Find more resources at www.startsatthesource.com
Fume Extraction Guns: Understanding the Basics
Fume Extraction Guns: Understanding the Basics
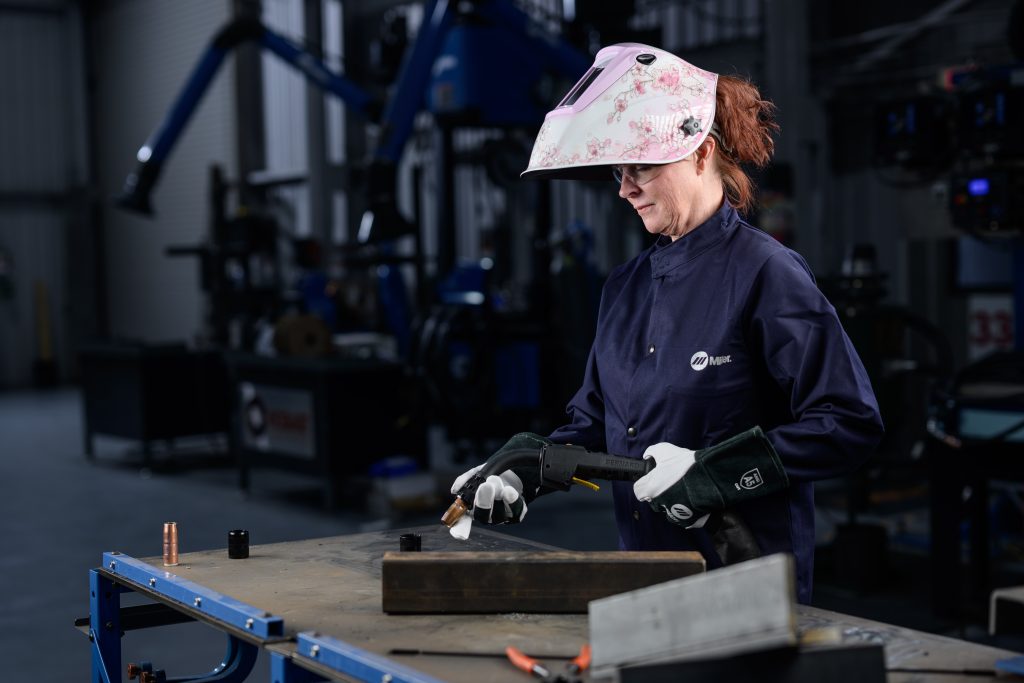
New industry standards from the Occupational Safety and Health Administration (OSHA) are protecting employees against potential health hazards in the workplace. These regulations, which dictate allowable exposure limits of welding fumes and other particulates (including hexavalent chromium), have led many companies to invest in fume extraction equipment. An increased desire to maintain optimal welding operator safety and to attract new skilled welding operators to the field is also a consideration in investing in this equipment — companies want to create the most comfortable and healthy work environment possible.
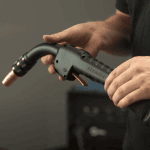
The Clean Air E™ MIG fume extraction gun, as shown here, operates by capturing the fume generated by the welding process right at the source, over and around the weld pool. With interchangeable shroud options to help customize your extraction for your application.
Some companies may opt for centralized fume extraction systems, which are designed to protect the entire shop area. These systems involve the installation of new ductwork and can be a costly investment for capturing fume particulate in the air.
Fume extraction guns are available in a variety of amperages, cable styles and handle designs. As with any welding equipment, they have their advantages and limitations, best applications, maintenance requirements and more. In combination with many other variables in the welding operation; welding wire selection, specific transfer methods and welding processes, welding operator behavior and base material selection — fume extraction guns can help companies maintain compliance with safety regulations and create a cleaner, more comfortable welding environment.
The basics of fume extraction guns
Fume extraction guns operate by capturing the fume generated by the welding process right at the source, over and around the weld pool. Various manufacturers have proprietary means of constructing guns to conduct this action, but at a basic level they all operate similarly: by mass flow, or the movement of material. This movement occurs by way of a vacuum chamber that suctions the fumes through the handle of the gun, into the gun’s hose through to a port on the filtration system (sometimes informally referred to as a vacuum box) like the Miller FILTAIR® 215 High-Vacuum Fume Extractor.

The welding fumes that these guns remove are composed of a combination of the filler metal and base material. Some fume extraction guns feature adjustable extraction control regulators at the front of the gun handle, which allow welding operators to increase suction as needed (without affecting shielding gas coverage), while others provide this function internally. Regardless of the manner, the ability to balance between the downward flow of shielding gas and the upward flow of the suctioned air is critical. The fume extraction gun needs to provide the appropriate amount of shielding gas to protect the weld from defects such as porosity, without sacrificing the ability to suction fumes efficiently enough to protect the welding operator. The balance allows the weld pool time to react and solidify, and gives the fume particles time to decelerate so they are easier to extract.
Typically, fume extraction guns are larger than regular welding guns and tend to be bulky due to the vacuum and hose necessary to extract the fumes. For that reason, some manufacturers create fume extraction guns with a vacuum hose swivel on the rear of the handle to make them easier to maneuver. Manufacturers have also, since fume extraction guns were first introduced (in the late 1960s and early 1970s), found ways to engineer internal components to minimize the handle weight in order to reduce operator fatigue.
Applications, advantages and limitations

Fume extraction guns are well-suited for applications using solid welding wire and those in confined spaces. These include, but are not limited to applications in the shipbuilding and heavy equipment manufacturing industries, as well as general manufacturing and fabrication. They are also ideal for welding on stainless steel applications, as this material generates greater levels of hexavalent chromium, and on mild and carbon steel applications. The guns also work well on high amperage and high deposition rate applications and are available, typically, in 300 to 600 amp ranges.
Fume extraction guns attach to a localized filtration system, as shown here. Fume removal occurs by way of a vacuum chamber in the fume extraction gun that suctions the fumes through the handle of the gun, into the gun’s hose through to a port on the filtration system.
For the best results, fume extraction guns should be used for in-position welding, such as on flat butt welds. In this position, they can most effectively capture fume particles as they rise from the weld pool. In out-of-position welds, the energy of the fume particles causes them to rise at a high rate, making it more difficult for the fume extraction gun to draw them downward and through the vacuum hose.
One distinct advantage to fume extraction guns is that they remove the fumes at the source. This will minimize the amount that enters the welding operator’s immediate breathing zone.
Maintenance tips
As with any piece of welding equipment, fume extraction guns benefit from preventive maintenance. Caring for them is similar to caring for a standard GMAW gun. Regularly check for tight connections throughout the length of the fume extraction gun to ensure good electrical flow. Minimizing electrical resistance helps ensure consistent weld quality and prevent premature failure of the front-end consumables — contact tip, nozzle and diffuser.
Frequently inspect the nozzle and contact tip for signs of spatter build-up, too, as such build-up can obstruct shielding gas flow and cause weld defects that ultimately will need to be reworked. Spatter build-up can also cause consumables to fail prematurely. Replace the consumables if spatter build-up appears or clean them according to the manufacturer’s recommendation. In some cases the shroud that surrounds the nozzle may also have to be replaced or cleaned free of spatter.
To ensure optimal fume extraction capabilities, inspect the vacuum hose regularly for damage, including cuts or kinks that could lead to loss of suction. Replace a damaged vacuum hose as necessary and dispose of it according to the manufacturer’s and/or an industrial hygienist’s directions.
Visually inspect the handle for cracks or missing screws, and also check that the gun’s trigger is not sticking or otherwise malfunctioning. Replace or repair these components as necessary.
Finally, maintenance on the liner is also important. As with the vacuum hose, use compressed air to clear out any potential blockages during welding wire changeovers or when removing the wire from the gun. Spending an extra few minutes clearing out any debris from the liner can save considerably more time than troubleshooting the weld defects and equipment problems that can result from blockages. Also, track the amount of time that it takes for a liner to wear during the course of the welding operation. Replace the liner prior to that in the future to prevent downtime for replacement during shifts or problems with wire feeding or quality.
When in doubt about maintenance or any other aspect of using a fume extraction gun, consider working with a trusted welding distributor, certified industrial hygienist and/or the fume extraction gun manufacturer to address any questions or concerns. Proper use of this equipment can help provide optimal results, and improve the safety and comfort of the welding environment.
Introducing Clean Air E™

Introducing Clean Air E™
Bernard’s Clean Air E™ fume extraction MIG Gun helps create a cleaner and more productive welding environment by capturing up to 95% of fumes at the source, improving weld visibility, and reducing welder fatigue. Designed for durability in heavy industrial use, it minimizes rework, lowers compliance risks, and supports efforts to attract and retain top talent. Say goodbye to compromise and hello to precision, performance, and peace of mind.
It Starts At The Source™
Learn more: https://www.startsatthesource.com
Features and Benefits of the Clean Air E™
Features and Benefits of the Clean Air E™

Discover the Clean Air E™ difference.
Superior Fume Control Right at the Source With up to 95% source fume capture efficiency, the Clean Air E minimizes airborne contaminants, protects your team, and improves visibility on every weld. It helps you meet stringent compliance standards without compromise. Effortless Ergonomics for Extended Use Designed for welders, the Clean Air E features a balanced build, optimized handle design, and a ball swivel for added flexibility. This reduces strain and improves control, focusing on comfort and efficiency to help welders stay productive through long shifts. Industrial-Grade Durability, Reduced Downtime Built for heavy-duty use, the Clean Air E is engineered to last. Its rugged design, combined with long-life consumables, reduces maintenance demands and lowers total costs, keeping your team welding without interruption. Enhanced Visibility for Precise Welds Clearer sightlines mean better welds. The Clean Air E is designed to minimize arc obstructions, providing improved visibility and weld access. With a better view of the weld puddle, welders can work with greater accuracy, control, and consistency.
Want to learn more? Click here.