
How To Install the LSR+ Flange on an OTC Daihen Robot
Note: The following instructions are applicable for OTC Daihen® robot models NB4, NB4L, FD-B4 and FD-B4L
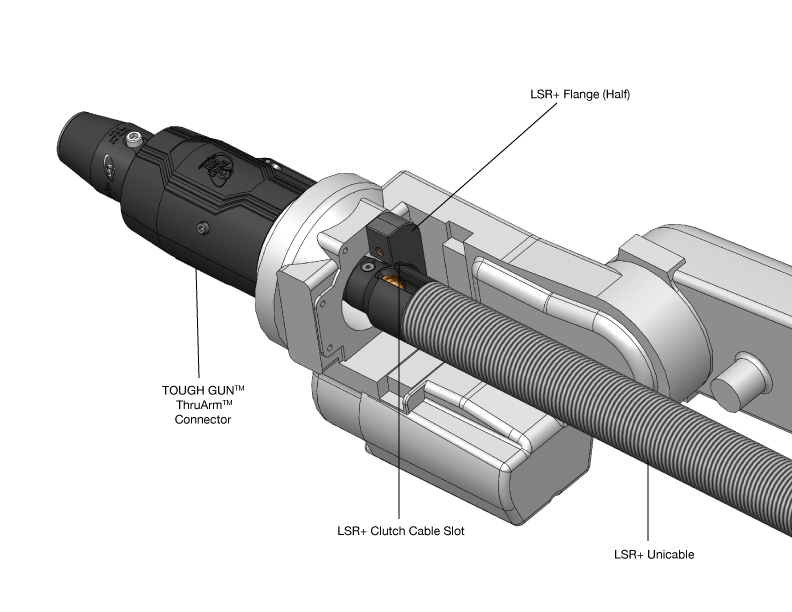
- Slide one half of the clamp between LSR+ Unicable and robot wrist.
- Make sure LSR+ clutch cable slot is facing up.
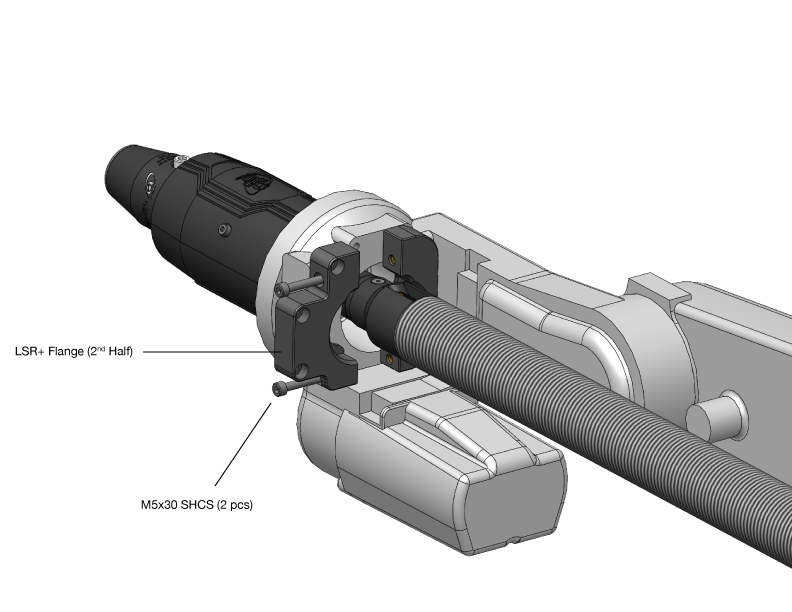
- Take second half of the clamp and assemble with M5x30mm LG SHCS. Important Note: Do NOT tighten the screws all the way.
- Make sure the space between the clamp is tight but can still be easily rotated over the cable.
- Secure the clamp to the robot wrist with M5x20mm LG. SHCS (3 pcs).
- Tighten the clamp over the LSR+ Unicable. Important Note: Make sure the LSR Unicable does not rotate by hand.

INS102 10/2022